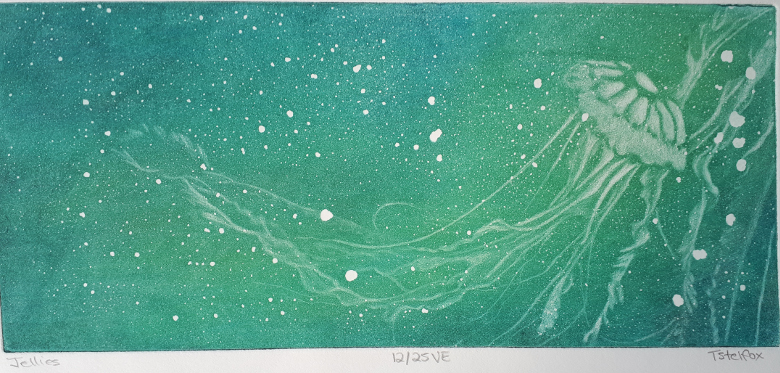
Making an Icing Sugar Aquatint

By Terri Stelfox

My name is Terri Stelfox and I am a maker. I graduated from the North Island College Fine Art diploma program in 2006 and the external Emily Carr University of Art and Design degree program at NIC in 2015. I work in a variety of mediums from pastel, oils and printmaking (collagraph, intaglio and wood block). Jellies is part of my printmaking process.

This past December, I created an edition of 25 prints named Jellies based on the look of mezzotint prints that I really admire. Traditional mezzotint requires marking the plate with fine lines for many hours with a tool (mezzotint rocker). I have done it and I find it an arduous process. The plates can be bought prepared but have a significant cost associated with them, which I also have done. Using aquatint with Baldwin’s Intaglio Ground (BIG) is one way to get the deep black of a mezzotint chemically instead of physically. There are a few ways to get an aquatint with BIG that I have been successful with, sandpaper aquatint and icing sugar aquatint among them. I referenced zeamaysprintmaking.com for those methodologies. For Jellies, I used the icing sugar aquatint. To do this I prepped my copper plate as normal ensuring it was grease-free. I rolled on the BIG so there was no copper visible. I sifted on pre-sifted icing sugar on to the coated plate, covering it completely and thickly, allowing it to sit for six minutes. I knocked off the excess icing sugar but didn’t touch the plate surface. I let the sugar coated plate sit for another 30 minutes, then put it into a 250 degree F (120C) convection oven for six minutes. I let it cool for 1 hour. Then the plate is soaked in warm water twice for 15 minutes. The plate sat for a day or two before I etched in the ferric chloride.

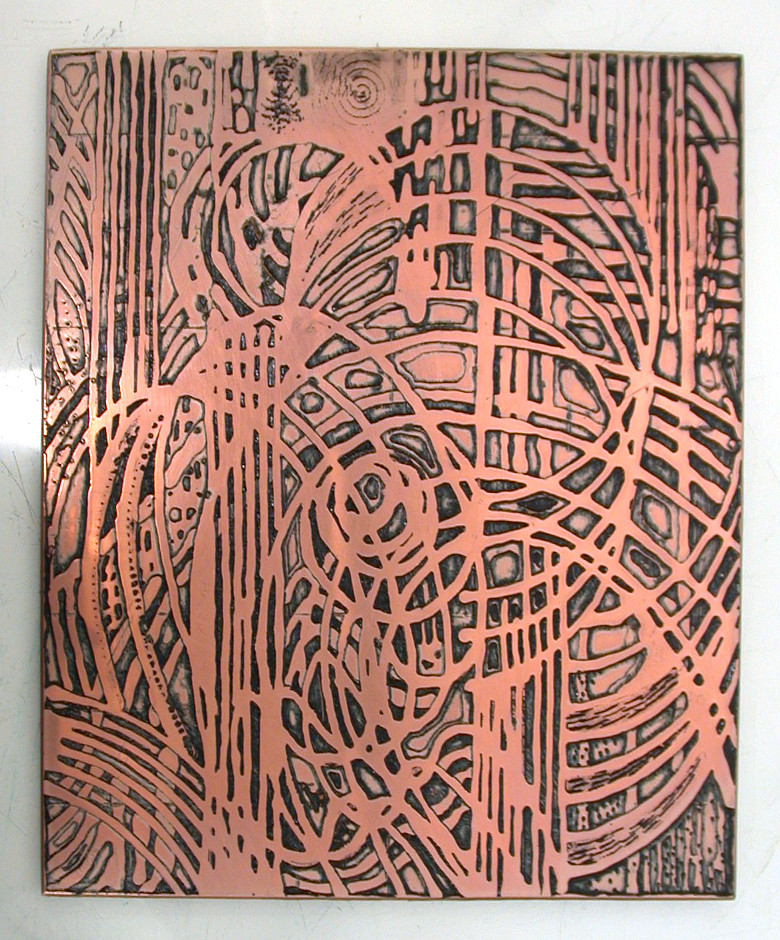
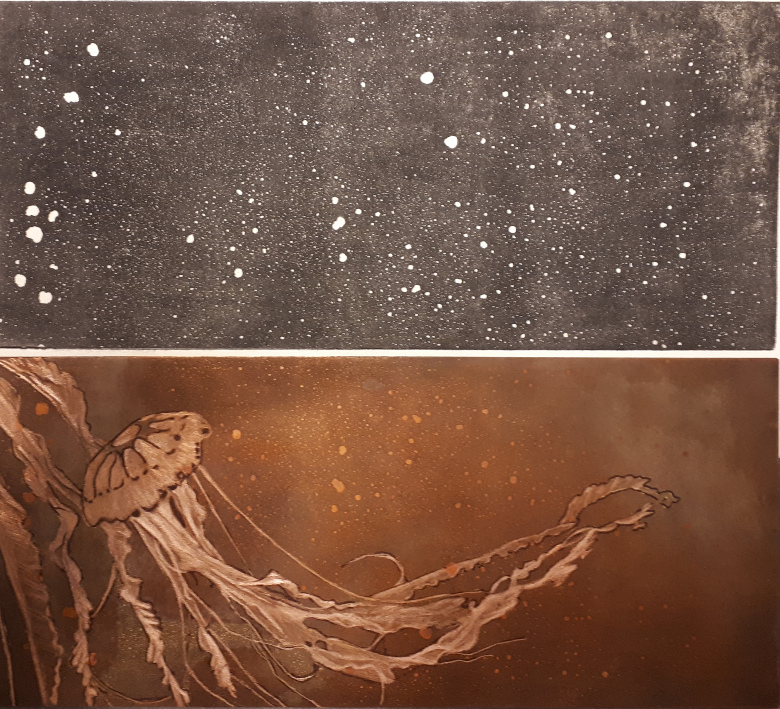
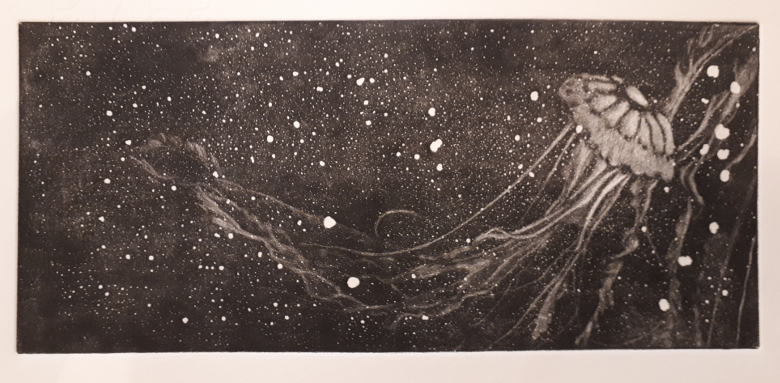
Below is the photo of the black printed icing sugar aquatint as well as the scraped back image. I etched the copper plate aquatint for 50 minutes in ferric chloride.

I transferred my reversed reference image to the plate and started to remove the burr (texture) with a metal scraper. The more you scrape an area, the more texture will be removed. The texture is what holds the etching ink when printing. Where the texture is removed (making smooth), the ink will be wiped out of those areas and will print lighter in tone. Where the texture is not modified, the plate prints with the full ink effect.

I proofed the plate with black ink and was happy with it.

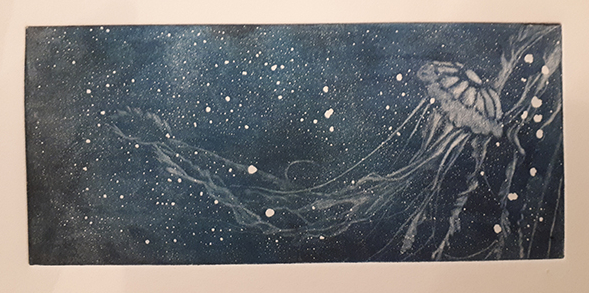
I then printed the plate in a solid dark blue.

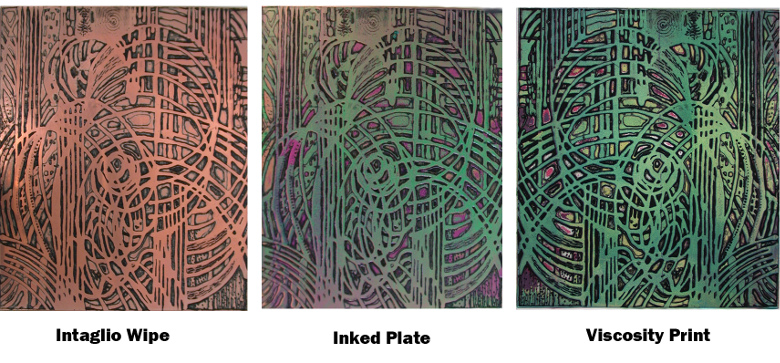
Then I got colour happy and explored inking the plate with multiple colours on the plate. The colours ranged from black, dark blue, medium blue, teal to a yellow green. How I wiped the ink off the plate influenced the image as well.

Viscosity Printing

By Channing Holland

Viscosity printing is a multi-colour printmaking technique that incorporates principles of relief and intaglio printing. The process uses the principle of viscosity to print multiple colours of ink from a single plate, rather than relying upon multiple plates for colour separation.

The process works on the principle that inks of high viscosity (sticky, tacky, dryer), rolled over a layer of an ink of a lower viscosity (thinner, runny, wetter) will be repelled. However, if the order is reversed, and ink with a lower, wetter viscosity is rolled over a layer of ink with higher, dryer viscosity it will be attracted to the first layer. Therefore, colours will either mix or juxtapose depending on their viscosity and the order they are rolled onto the plate. The distribution of the colours in the final print can additionally be manipulated by using hard or soft rollers, varying pressure on the rollers, and the depth and number of layers in the printing plate.

Two to three colours of ink are mixed, each of a different viscosity (thickness). This property is adjusted by the addition of solvents such as raw linseed oil, plate oil, or flash oil.

The artist produces images by creating lines or textures on a plate made of metal or cardboard. The metal plate method is called Etching and the image is produced by using acid to incise the image into the plate. The cardboard plate is called a Collagraph plate. It allows an image to be produced by cutting into the plate or gluing items onto the surface. The more layers and levels the better. The plate is then inked in several stages. Usually dark coloured ink of a high viscosity, is forced into the deepest recesses of the plate with a card or stiff brush and then wiped off the plate’s surface with a tarlatan (stiff gauze). This usually brings out details and is called an intaglio wipe.

Intaglio Wipe

The next colour, of a slightly thinner viscosity, is then applied to the surface of the plate with a rubber brayer (roller). The varying viscosities of the ink prevent them from mixing. A second colour, of even thinner viscosity, can also be applied at this point and even a third, thinner colour. The technique works best on plates that have been etched or built to several different depths.

Inked Plate

A damp sheet of printing paper is then placed on the face-up plate and passed through a printing press, which prints all the colours simultaneously. This is an advantage, as registration of the plates in some other multi-colour printing processes can be difficult.

Final Print
Channing Holland, Colour Notes, 1/1, etching

Metal etched plates or hand built collagraph plates are great for this method of printing. The results are not always entirely predictable but they are interesting, exciting and often spectacularly beautiful.

Channing Holland, Celtic Cross, collagraph
Channing Holland, Nap of the Earth, etching
Channing Holland, Celtic Knots, etching
Channing Holland, A Trace of Times Past, collagraph

For a simple demonstration of this process see the following: https://thecuriousprintmaker.co.uk/viscosity-printing/

References:
Hayter, S. W. (1981). New Ways of Gravure. New York, NY: Watson-Guptill Publications.

Reddy, K. (1988). Intaglio simultaneous color printmaking: Significance of materials and processes. Albany, NY: State University of New York Press.